On the Farm

On the Farm

Thursday, December 9, 2010

Waiting for SANTA!


I cannot believe it. I've been so busy with my 'bucket list' of projects that I want to get done before I start student teaching in the Spring, that I have completely forgotten to add my monthly posts of the Biscuit!!!! This goes to show all the men and WOMEN out there, that believe that us SAH Mommies out there sit on the couch all day, are very very VERY WRONG!

Well, okay, so I do know some women that do this, but definitely not me. Not only do I have several projects going on, but I've also decided to add some of my favorite recipes on my blog as well for my girlfriends!!!

Not to mention getting the house ready for the holidays, the 2 loads of laundry per day (for some reason), along with all the cleaning that goes with a house that has 3 floors....Oh yes, and how could I forgot....A TODDLER!

Noa's growing like crazy....well, mentally maybe, but she's still a midget I tell ya! Nana and Papa weighed her, at 17 1/2 months and she weighs 19.8 lbs! There will not be any standing in the back row for group class pics for this little girl in the future, this we are now convinced of!!!

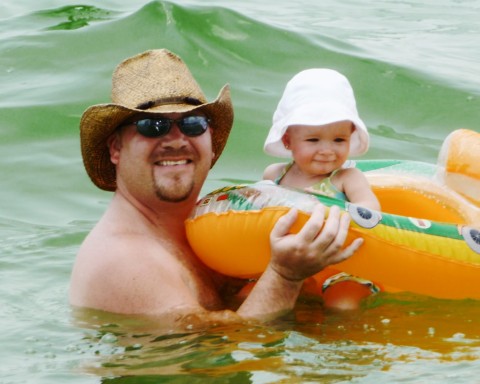
So, there's been alot going on in the past couple of months, including one trip to the zoo. Noa loved it!!! It was a beautiful day!!! Every single animal she watched at the zoo, she watched as if it was her last animal she would ever see....it was adorable. But with that was a short meltdown while so was being drug away, only to stop shortly after when the next animal was spotted at the next exhibit, followed of course be another scream when leaving, and so on. We knew she loved animals, but we never realized how much! IT WAS SO MUCH FUN WATCHING HER SO INTERESTED!

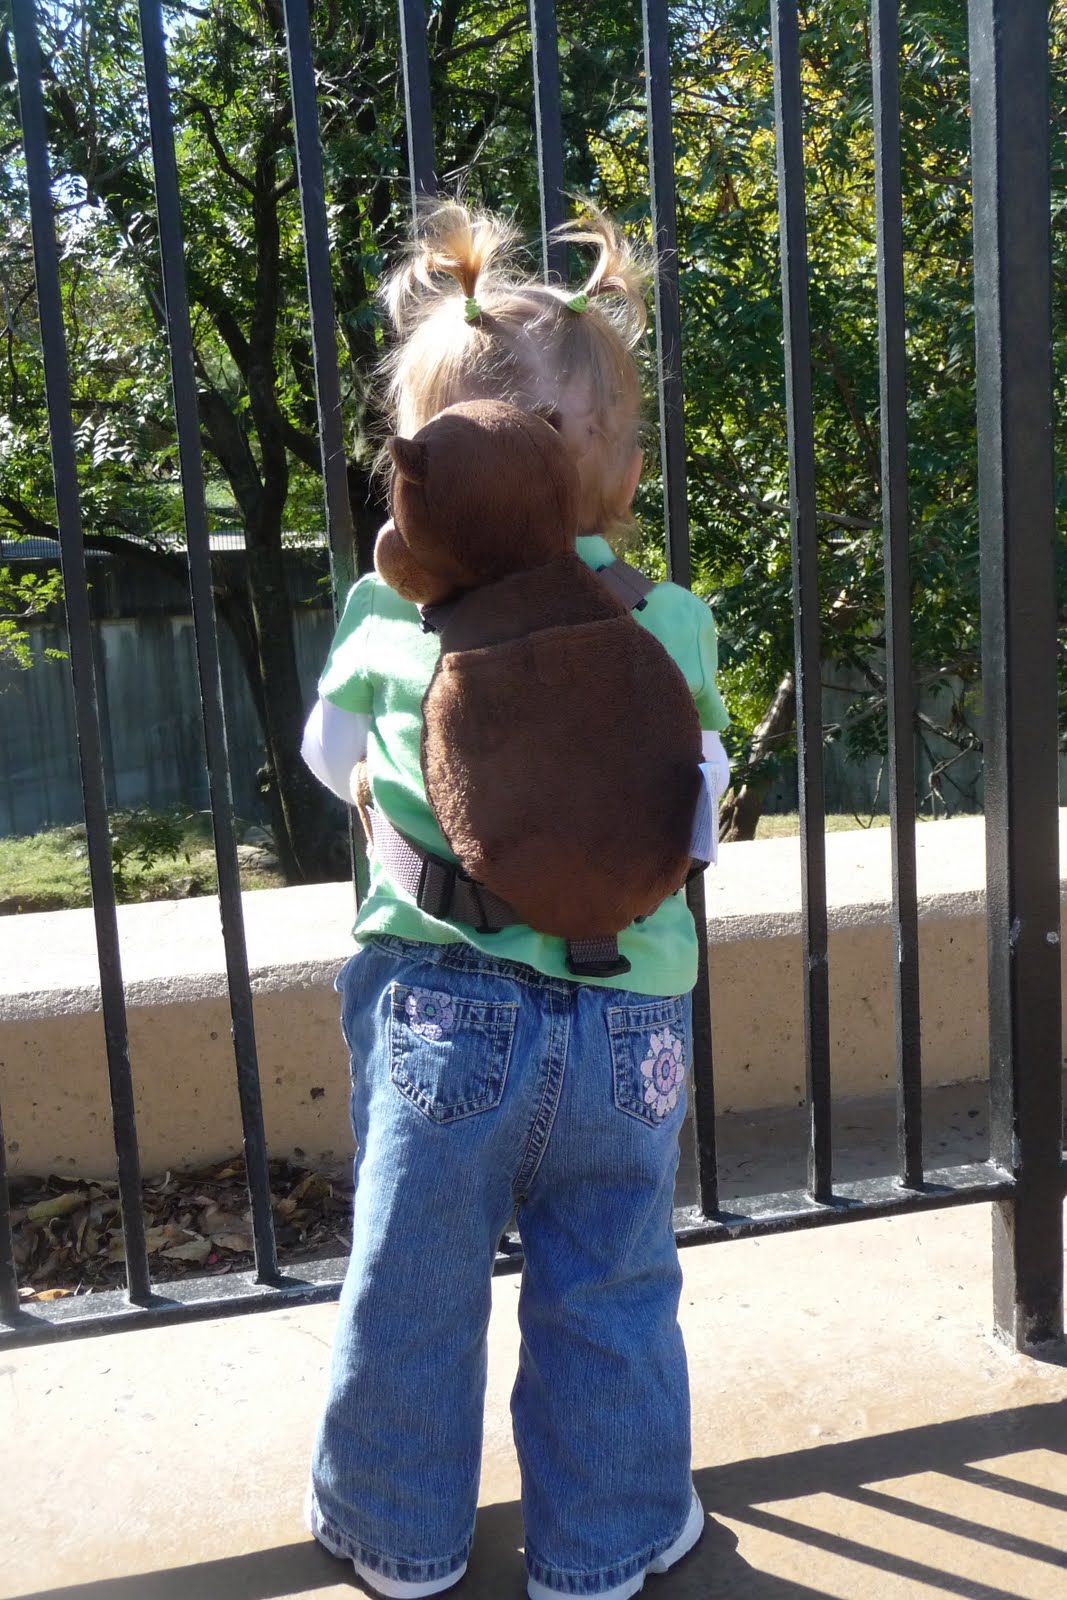
And yet another reason that I know she loves animals....before we left I bought her a monkey harness....that's right, I said a MONKEY HARNESS for kids! Listen, when you drive 3 hours to the zoo, the last thing you want is to make your toddler ride in a stroller all day, and did I mention TODDLER....it's not like she would just walk gracefully next to you all day!

Well, of course this bites me right in the face. It's not 30 seconds after we get there that I put the harness on her and try to get her to walk with me.....which ends in her falling face first on the concrete (you'll see the mark on the pics!). This ended in my husband cussing and me learning a quick lesson that harness are to keep kids from running away from you, not meant to lead your kids! OOPS!

So, I decided to take the harness off, which she then refused to take off the monkey backpack that came with the harness. So the Biscuit spend all day walking around this this monkey backpack on.....ADORABLE!!!!!

We didn't have enough time for the Science Center. But I'm really hoping the hubs will take us this winter before Spring! If not, we'll plan it in our next zoo trip!


A GOOD TIME WAS HAD BY ALL.....

So, when we got home that night, I threw in Madagasgar so Noa could see all the animals that she had seen that day. SHE WON'T STOP WATCHING IT....She runs around the house saying, "Zebra, ZEBRA!!"....I'm telling ya, this girl LOVES ANIMALS!

She has a big book of animals, she can name them all! One page has about 13 different kinds of birds and she knows each of them....it's amazing what they pick up on at this age!

So....OCTOBER Past! Oh, Noa was a skunk for Halloween. She was adorable. And got lots of candy! She had so much fun! She even ended the night visiting her buddies Kase and Kesli (she loves Kes!).


Okay, so November. Not much going on, it's getting cold, Noa keeps learning and growing, and we are getting ready for the Holidays! We of course put the tree up 2 weeks before Thanksgiving. I love this time of year. I love spending it with family!

Oh, by the way, I make a homemade pumpkin pie out of real pumpkins....AMAZING! Check out the recipe on the blog in DECEMBER.

So, now it's December and there's already presents under the tree. I thought I was excited for Noa's FIRST CHRISTMAS....But I'm ten times more excited about NOA'S SECOND CHRISTMAS!!!! I just cannot wait until that morning to watch her open her presents!!!!! I've got to tell you all, being a Mother is the greatest gift that I've ever been given!!!! It really makes a woman who she is because of all the wonderful feelings that go along with all the love!!! And it also gives you soo much more respect for my own Mother! How I am happy to report is feeling great and recovering well!!! God has definitely blessed us this year with good news in regards to her health!! I'll tell ya, for those who do not believe in God, I'd love to show them all the miracles he has given us in the last few years!!!

Okay, and speaking of great things!!!....I GOT MY CAMERA! Yes, it's an early Christmas Present! I'm soooo happy!!!!!...as if I wasn't before. Okay, I'm a bit more happier! I'm so excited to capture Christmas and other great events with my camera!!

Now, we are deep into December...it's cold and we spend most of our time inside because MOMMA HATES THE COLD! Christmas lights and decorations are allover the house!!!!

So, next up, CHRISTMAS!


Italian Spinach Pasta


So, I watched Giada make this really good pasta with spinach and fresh cherry tomatoes one day. I made it and it was good….especially for a Girl Day during the summer. It was light. However, my hubby wanted something more…it needed more depth. Still, I loved the idea that she used spinach in her pasta. So, I decided to come up with my own recipe, but still keep her spinach aspect in the pasta!

This is a cozy, alone, afternoon meal in my book. Meaning, it’s filling in my opinion, and makes a great meal on those afternoons or evenings when the hubby is watching the ballgame with his buddies and the kids are visiting the grandparents! I love to make this dish, cuddle under my blanket on my couch, and get caught up in whatever Real Housewives show is on my DVR….or lately, Sarah Palin’s Alaska….I love her ruggedness and blunt honesty!

Enough Sarah Palin talk….I may lose some readers!

My hubby’s definitely a meat and potatoes kinda guy, so I actually make this as a side dish for him when we want something different!

Okay, your Ingredients:


1 pckg fresh Spinach, roughly chopped

1 tbs tomato paste

1 cup of HOT water

15 or so cherry tomatoes (if you don’t have cherry, use a can of diced tomatoes and the juice or chop 1 or 2 tomatoes that you have

½ cup of Olive Oil

About 2 cups uncooked noodles (I use Penne, but you can use whatever you want)
1 cup Asiago cheese (I buy is shredded in the special cheese section)
½ - 1 cup of parmesan cheese

Italian Spices

Basil (I use fresh)

Oregano

1-2 Garlic Cloves

Let’s make some pasta:
Through your pasta in some boiling water….LISTEN…..It’s important that your pasta is AL DENTE….Don’t overcook it. There’s nothing worse than overcooked pasta! So keep checking it.

While you are boiling your pasta….
Roughly chop your spinach. Cut you cherry tomatoes in half.

In a pot, heat your Olive Oil on MEDIUM HIGH. You want your oil to get hot. I know, ½ cup of oil? Stay with me here….it makes a great base and adds to the other ingredients to create ‘warmth’ in your dish.

When your oil warms, through in your spinach and toss for a bit. Put a lid on it for a few seconds to let the spinach cook down, tossing every so often. While that’s cooking down, through in your tomatoes and your garlic. I use fresh garlic because I have a press…..but minced works just fine too. (If you don’t press your garlic or chop it, always keep minced in your frig….heck, regardless, always have minced available in your frig!)


Toss those ingredients and let them cook a bit. If you think your temps to high, just turn it down a bit and let those ingredients simmer together. KEEP WATCHING YOUR PASTA. Whenever it’s down, drain it….if your pasta gets done to earlier, throw it back in the pot after draining and put some Olive Oil in it to keep it from sticking together.

Back to your ‘sauce’….While your ingredients are simmering, get a cup of HOT water and add 1 tablespoon of tomato paste to it. STIR, STIR, STIR….OR WHISK, Whatever. I whisk!

At this point, your pasta should be done, if you haven’t already drained it, do so.

Now, pour your tomato paste/water mixture in the spinach pot. Stir. Then throw your pasta in, and throw in your 2 cheeses and tablespoon of each spice……TOSS THAT SUCK!!!


VIOLA…..IT WILL MELT IN YOUR MOUTH!!

Saturday, December 4, 2010

BBQ CHICKEN PIZZA


Okay, so….BBQ Chicken Pizza….I had it before, about 9 years ago….hated it!!! I really can’t even tell you why, in fact, after what I had the other night; I’m convinced that what I had 9 years ago was definitely not bbq chix pizza! (Oh, chix is short in restaurant for ‘chicken’, and being a waitress in my past during college, it’s just easier!).

Well, the other night we visited Jon, Krissy and Baby Will Biggs (Drew was at his Nana’s!). We all ordered a pizza in which Jon and Krissy raved about….the bbq chix pizza from Morelo’s in H’burg! To be honestly, I don’t think Colb or I was much interested in the idea (because of what I previously thought), but once the pizza box was opened….so was a whole new world! What a great choice by Jon and Krissy…..IT WAS AMAZING!!! (BRAVO, Jon and Krissy……BBRRRAAAAVVVO!!!!)

So, I almost forgot about it until I was thumbing through the Pioneer Woman site that this pizza ever existed! I looked at her recipe to see how she made it, and then decided I would try this one on my own. I decided to make up my own recipe since I just couldn’t get Morelo’s version out of my head! But to give The Pioneer Woman credit where credit is due, I did use three of the same ingredients…..chicken, bbq sauce (but a different kind), and mozzarella cheese)….oh, and onion….but really, is that any different from anyone else’s????? Still, I love her! (Oh, by the way, she covers hers with fresh cilantro after taking it out of the oven….I haven’t tried that but put some on your piece and see if you like it!)

1) THIS IS NOT STORE BOUGHT PIZZA CRUST!!!......YUCK YUCK YUCK!!!! Seriously, there is no point making pizza if you are going to use store bought like Pillsbury or whatever! I searched and searched and searched for a restaurant style pizza crust…..and I finally found one…..so please please PLEASE, use mine! This pizza Crust also works for regular pizza too…..I just add garlic and all kinds of Italian Spices to my dough when making regular pizza!

2) If you have a Bread Maker….use it…..if you don’t have a one but have a Kitchen Aid mixer (or similar) with a kneading attachment….use it!....it makes your life sooooo much easier! Now, if you don’t have any of these things, just mix and knead the dough how you normally would your bread…..including rising, etc.

3) Stretch or roll your dough while warm….cold dough = not very workable!!!

THE DOUGH
(Bear with me, I have a bread maker….so if you don’t, just follow the ingredients, again, how you would do any other dough….if you have never done dough before, just get online and see how some women do their recipes. But if you do that, I’m warning you, stick with my recipe ingredients….you won’t be sorry!!)

Ingredients:
1 C Flat Beer
2 Tbs butter
2 Tbs sugar
1 tsp salt
2-3 Tbs honey
2 1/2 C flour
2 1/4 tsp yeast (or a package of yeast)

In Bread Maker….add ingredients as they are listed. After you add the flour, make a well with your finger in it (looks like a little crater in the dough) and add the yeast into the flour. I personally buy one of the big (ger) jars of yeast than just the packets because it’s so much more cost effective.

Turn your bread maker on dough and let her fly!

When it’s done, take the dough out, this recipe will make 1 X-2X large pizza or 2 med-large pizzas. I personally make two large ones because you have better control of your inner crust not being gooey!!!

If you’ve worked in a pizza place, then throw and stretch your dough, but for people like me, I kind of toss it around but most just roll it out into what appears to be a circle!

OHHHH…..The best way to separate any dough is the form it into a ball, grab the middle, and pinch the bottom half off (I learned that from my Momma about 2 weeks ago!) So, VIOLA…..Simple DOUGH FORMING 101!

Now, AGAIN, roll that dough out (in this case on the two smaller pieces).


THIS IS EXTREMELY IMPORTANT…….It may take you making this one or two times to decide how you want your dough! …… if you make your dough a little thicker, be careful if you pile on your toppings, you don’t want gooey…..if you do make a bit thicker, I would cover the outside edge dough with foil and cook the inside dough open in the oven for about 3-5 minutes on 500.

I made this one thin crust, and actually made it too thin….a lesson I will take with me the next time. Again, it may take you a couple of times to figure out your style of crust. Just make sure that while you load up on your topping, you don’t make it too thick that the crust won’t cook!

Still, I give my outside edges one this little roll to make an outside crust!
Grab your pizza pan and drizzle a good amount of OLIVE OIL on the pan and through your rolled dough on it…..pinch some salt onto the dough.

Now, let’s talk topping….

THE TOPPING:
7-8 chix tenderloins or 1-2 chix breasts

1-2 jars of bbq sauce (PREFERRABLY SWEET BABY RAYS),….If not, just use plain ole’ bbq sauce, nothing fancy, nothing too flavored, and definitely not a masterpiece or smoked or anything else…..JUST PLAIN BBQ SAUCE!

Mozzarella Cheese (one bag will do….best to get the fine shredded or you can get fresh if you want too)

One medium red onion

BUTTER

Bacon Bits or real cooked bacon cut into small bites/bits (OPTIONAL)

Okay, once you have formed your dough, or while you are making your dough.....
I work with tenderloins; again cost effective….but chix breast would be great. Put your oven on 350 before or while you are making your dough. Put 1-2 tbs of butter in an oven safe dish and smear it around….you want a little excess…it will give the chix an awesome flavor with the bbq sauce and keep it a little more most!

Place the chix in the pan (after you have smeared your butter), then pour some of your bbq sauce directly over your chix….smother them but you don’t have to use the entire bottle or anything (1-2 cups is fine!).

Throw those chix in the oven and let them bake about 30-40 minutes, flipping once or so, or until done. You’re going to know when they are done because they will fall apart nicely.

Take out your chix out of the oven and cut it up however fine you want (I cut mine into small chunks….other’s like to shred!)


NOW PUT YOUR OVEN ON 500!

OH YEAH, if you make too much….who cares, just makes a bbq chix sandwich with the leftovers the next day!
Cut your RED onion in half and remove the skin. You want THIN to SEMI THIN strips of onion….it’s just easier! So cut your onion in half, and then slice into your strips!!

NOW FOR PUTTING ON THE PIZZA….
ON THE DOUGH,….
.
DRIZZLE A GOOD AMOUNT OF OLIVE OIL ON TOP BEFORE YOU PUT YOUR SAUCE! The oil on bottom and top of the dough will help the dough cook better and give it a gooooood taste!

Now, pour about ½-1 cup of bbq sauce on the pizza…..you’ll see what’s the right amount as you are doing this.


Then, spread your cheese over the sauce. Again, even if you want a lot of cheese, do it thin, that way the dough cooks adequately and isn’t gooey gross! (pics below in case if you are confused on the right amount). If you use fresh mozzarella, slice it THIN and then add your desired amount…..just keep the slices…THIN!!!!!
Next, put your onions on (amount and how is your choice)….then put your bbq chix on (again, it’s up to you how much).

Now you can put the bacon bits (use the real bacon bits of you have the choice…not BACO’S). This is optional….in our house, everything is better with bacon or real bacon bits, so we always try!) It’s good though, and not too over powering!
Next, put just a bit (just a tiny more) cheese on the top (maybe ¼-1/3 of a cup (really, more just for looks) and put a couple of dabs of sauce here and there on the top too.


FINALLY….THROW THAT SUCKER IN THE OVEN (AT 500 REMEMBER) for about 10-15 minutes until the top is perfection! WATCH IT THOUGH……DOUGH CAN GET TOOOOOO DARK IN A MATTER OF SECONDS! So, check it every minute or two after the first ten minutes.
When done, take it out, let it cool a bit, throw some parsley on top for make it prettier (if that’s even possible) and enjoy!!!!

I’M TELLING YOU…..IF YOU NEVER COOK ANOTHER THING IN YOUR KITCHEN, AT LEAST COOK THIS FIRST!!!

Tuesday, November 16, 2010

CHIPOTLE RANCH DRESSING....OR JUST RANCH DRESSING IF YOU DON'T ADD THE CHIPOTLE : )

So, here’s my problem with store bought salad dressings…..THEY CANNOT IN ANY WAY COMPARE TO THOSE THAT ARE MADE AT HOME! Why is this? I’ve realized homemade dressings taste more like restaurant dressings than store bought….watered down? Maybe, but really, the truth is that if you turn your label around on store bought dressings, you may find that there’s only about 3 ingredients that you can actually pronounce. What does this have to do with the taste? …EVERYTHING!!! Now, while sometimes these ingredients can add flavor, in my opinion, they actually end up ruining your food, not to mention your body and your health!
Also, it’s important to remember that while restaurants purchase dressings and foods with hard to pronounce ingredients, the bottom line to them is to buy cheap, cheap, cheap….and when you buy cheap, cheap, cheap, that means the amount of ingredients in your items will be reduced greatly!

Back to the task at hand….
So, I’ve searched and I’ve searched and I’ve searched to find a good ranch dressing! No luck! I DON’T LIKE HIDDEN VALLEY OR ANY OTHER BOUGHT RANCH….it’s thick and tastes more like you’ve just stuck a block of cream in your mouth! YUCK! I also hate ranch dressing that are homemade with sour cream, which I think may quite possibly be a base in these store bought dressing. Don’t get me wrong, I’ll use it for dipping if I’m at your house, it’s just that in my home, if I have a choice, I choose a different route.

I have to tell you that one of my favorite things about eating out at restaurants like Red Lobster and the Outback is THEIR RANCH DRESSING! Oh, it’s wonderful! It’s not thick and a little bit goes a long way! It’s perfection in my opinion. So I set out a few months ago to find a great ‘Outback’ type of ranch dressing! This wasn’t a super easy task because it meant researching different recipes, then making, adding and taking out ingredients to match the taste I wanted!

After making and testing a few times….FINALLY I HAVE IT!!!!
I call it…..

MY CHIPOTLE RANCH DRESSING!
Now, if you don’t like chipotle, don’t use it in the dressing. It doesn’t make it hot, but really gives it a neat smoky flavor! It spices it up a bit! Also, if you like a different spice that you think may work well, as in cumin or taco seasoning (same thing, by the way), go for it!!

I must also tell you that you can choose the consistency of your dressing. I don’t like my dressings super thick. I like them to have more of a liquid consistency than a paste-type consistency.

I MUST ALSO TELL YOU THAT IF YOU ARE LIKE ME, THEN IF YOUR DRESSING SITS OVER NIGHT OR FOR A DAY OR SO AND BECOMES LESS ‘LIQUIDY’, FEEL FREE TO ADD SOME MILK, SHAKE, ADD MORE, SHAKE AGAIN, UNTIL YOU ARE BACK WITH YOUR CONSISTENCY.

Also, check the date on your milk label and write that date on a piece of tape and put it on your dressing so you know when you don’t want to use that dressing anymore. I don’t even normally come close to this date, as I eat salad everyday and much on veggies all day long. This is great as a dip and I always serve this with my veggies to company or during the holidays!

HERE’S THE RECIPE:

1 CUP OF MAYO (The real deal. If you use low cal mayo the taste isn’t as great….and forget about miracle whip!)

½-1cup of milk (this depends on how thick you like your dressing, I normally lean more toward 1 cup of milk…..but you can add and shake as you go till you get to where you want to be! And don’t be afraid to add more later if your dressing hardens a bit
1 tbs garlic

Dash of salt

1-3 tsp pepper

1 tsp of chipotle (but really I just shake to taste…but remember, your dressing will sit and the flavors will get bolder as it sits, so you may want to stick with the directions for now)

1 TBS Ranch dressing mix (powder)


COMBINE ALL INGREDIENTS IN A COVERED DISH AND SHAKE THE CRAP OUT OF IT….LET IT SIT IN THE FRIG FOR ABOUT AN HOUR. CHECK YOUR CONSISTENCY AND ADD MORE MILK IF YOU CHOOSE! LABEL YOUR DATE!!

ITALIAN MEATLOAF....ITALIAN MEATBALLS

So yesterday I created a 'blunder' that actually turned out to be FANTASTIC!
Growing up, we never ate meatloaf. I've never been able to figure this out since my father loves good'ole southern food. The only reason I can contribute to this is that he was surrounded by three women that have very odd eating habits, which at many times are surrounded by red meat ISSUES! My sister would NEVER eat red meat, I would only eat red meat under specific conditions, and my Mother, well, my Mother would just never eat.

My first experience with meatloaf was tasting it at my Mother-in-Law's house. She's a great cook, but she wasn't the one who had actually made it. Well.....I must say to whoever made this dish....it was absolute heaven in my mouth! It was so moist and tender and when I made a sandwich out of it, a whole new world opened! I was addicted, it became something I would crave in the future. Now, this is a good thing because he have feeder cows, and to 'support the case', we of course eat alot of red meat.

So I was off, in search of a great recipe! And like with any great recipe, I always add and change to make it my own based on what I think would make it good. However, I do have a couple of specific rules prior:

1) I hate reheating meat in the microwave (much less using my microwave period). As a result, my loaf must be moist to withstand the 'eating of leftover' action.

2) I'm very anti using cornflakes in anything but in my cereal!...not to say that it's a horrible idea, and to each their own, I just can't do it!

3) In every dish, it must have to first bite...'oh this is great' factor...since I am one of those people that loves the look on my husbands face when he eats something great I have just made for him.

I have came up with a couple of meatloaf recipes, based on my research, that I really love. These recipes represent good'ole southern style meatleaf....until last night.


Now, before I say this, I have one very big problem in my kitchen. I have a recipe box, I have recipe cards, but I have never had the time to sit down and write all of my recipes and organize them. This is something important to me since I always remember my Grandma Hammye using these recipe cards, and my Mom now has many as well. As a result, many of my recipes are handwritten on whatever piece of paper that was laying closest to my kitchen. And that also goes for my writing utensil, which now seems to be either pencil, marker, and now CRAYON!

Now, back to the task at hand, I found my untitled recipe for meatloaf last night and started assembling it early to throw in the frig and then cook a couple of hours later. I combined all my ingredients from my POST IT note recipe, and then realized that no where in my list of ingredients did it call for adding KETCHUP....and that's when I had realized....

I HAD JUST SUBSTITUED MY WONDERFUL MEATLOAF RECIPE WITH MY ITALIAN MEATBALL RECIPE!!! YIKES!

Now, the one aspect of this that made me rest easy, was that of many women make ITALIAN MEATLOAF....so I added how much ketchup I thought would work, put it in my pan, covered it and forgot about my mistake.

A couple of hours later I popped it in the oven and prayed that my mashed potatoes, corn and yeast rolls would still compliment my loaf. When it was done, my hubby began to eat....after a couple minutes of eating he looked at me, on no!!...this was it, he was going to tell me that it just didn't taste right...However, to my surprise he said,

"THIS IS SO MUCH BETTER THAN ANY REGULAR MEATLOAF I'VE EVER TASTED!!!"


MISSION ACCOMPLISHED! He was right, it was perfect!!

So here's the recipe....this one is for MEATLOAF....you will also find below how I leave out the ketshup and make meatballs. (Sorry, I don't have pics at this time but I will add them next time I make this....but really, you don't need them)


ITALIAN MEATLOAF
(these ingredient amounts works great for 2 people to eat that night and then for each to eat leftovers the next day...if you have a large family, I would suggest 'upping' your ingredients by about 1 1/2 - 2 pounds of meat. Of course you also have to 'up' your other ingredients too!) 2 POUNDS WILL MAKE ALOT OF MEATLOAF, enough to feed 4-5 people with leftovers.


1 lb Ground Beef
2 garlic cloves (I use fresh squeezed through my hand mincer, but refrigerated minced works well too!)
3 tbs parsley (optional. but fresh works the best)
5 tbs Romano, Parmesan or Asiago cheese
1 egg
1/2 C of milk
1/2 Italian Seasoned bread crumbs
1 finely chopped medium or small onion (whichever you prefer)
3/4 cup of ketchup


Combine all ingredients in a bowl and mix'em up well. Set your oven on 375 degrees. Now, I don't use an actual LOAF pan, I just use a glass pyrex pan of whatever size...I like this because I don't like to stuff my loaf into a tight pan, I like to leave room on each side up my loaf between it and the pan.

Spray the pan and squeeze some (extra) ketchup in the bottom where your loaf will lay. This is make a neat 'crust' and will just give it a different dimension of flavor. Once you've done that, put your ingredients in the bottom of the pan and form a loaf. Don't PRESS to ingredients tightly together but more 'form' the loaf, using your best MOM hands. You want you loaf to be one entity but you don't want to pack it down!

Squeeze some (extra) ketchup over the top of the meatloaf (I like to use alot and cover that sucker!!) and pop it in the oven on 375 for about 1 hour. Honestly, you'll know when it's done because you can see it browning on the top where you don't have ketchup (if you don't). You can also separate a portion of the middle and take some out with your fork to check the color...but I'm telling you, IT'S DONE! Cook it good, but don't overcook it, you don't want it to dry out. But I'll tell ya, the MILK is what helps it to be super moist!

NOW, IF YOU DON'T WANT THIS TO BE AN ITALIAN LOAF, Just cut down the cheese by half or leave it out all together, and use REGULAR BREADCRUMBS INSTEAD OF ITALIAN. Now, if you are make italian meatloaf but only have regular breadcrumbs, just add alot of italian spices, oregano and basil....trust me, you can't mess up with these spices.
I make my loaf with mased taters and corn but I gotta tell you that this would also work well along side of pasta or even put it on top of your spaghetti if you want.

MY FAVORITE IS MAKING A SANDWICH OUT OF IT!! You don't need fancy bread, just put it between 2 slices of wheat bread and VIOLA....A WHOLE NEW WORLD!!!

NOW.......LET'S MAKE THE MEATBALLS....

ITALIAN MEATBALLS...
Use all the ingredients, just LEAVE OUT THE KETCHUP!!! Combine ingredients and roll GENTLY into whatever size balls you prefer. Now, I must be honest, I would still add just a touch of ketchup for a tomato-ee taste, but it's really up to you!!!

Cook the meatballs again at 375, but you just want to check them to see if they are browning. This may take about 30-45 minutes. I HAVE TO TELL YA.....THESE ARE AMAZING WITHOUT SAUCE. But you can put them in your sauce and let them simmer....but you really don't need to, they will have this great harder outside and moist heaven on the inside!!!!

Now you can serve these with spaghetti or make a meatball sandwich out of them!!!

Saturday, November 6, 2010

PUMPKIN PIE FILLING....The Real Deal!

Okay, so this was supposed to be pretty exciting at the house! Noa was finally able to enjoy HALLOWEEN!! Well, kind of, she's 16 months now, she that really means she running around and loving using her hands! We decided that this year would be so much fun to carve our Jack-o-laterns for Halloween, eventhough we knew the dogs would carry them off within a day or two. Well, we got so busy the last couple of weeks before Halloween that we actually didn't get a chance to carve our pumpkins as a family! Of course I wanted to save the seeds so we could grow our pumpkin patch for next year, but I just couldn't bring myself to throw away 3 perfectly good pumpkins! And since I love PUMPKIN PIE.....I decided to do something I never did before! I COOKED AND SAVED MY PUMPKIN INNERDS!!!!

REAL FILLING FOR PUMPKIN PIES!!!

Now, keep in mind this is just the pumpkin, when making your pie, remember you will need to add things like sugar and such for your actual pie filling. This is just to instruct you on how to save your seeds and your filling!!!

Start like you would if you were carving your pumpkins. If you are carving them, you would simply scoop out the slime and seeds with an ice cream scooper.....SAVE THEM IN A BOWL...A BIG'UN)! In this case, since we didn't carve them, I simply sliced my pumpkins in halves and scooped everything out!!

FOR THE SEEDS:

Once you scoop everything out and into a large bowl, fill the bowl (with slime and seeds) with water about 2/3 or so full. (Leave in the sink to reduce mess). I let it sit for about 3 minutes are so. Then you just work the seeds and slime with your hands to separate them. Put the seeds into a smaller bowl and you will again fill with water and work it again to make sure you get all of the slime and small pieces of pie off.

Toss the Slime, Keep the Seeds!
Drain the seeds from the water. Now you want to get alot of the water off the seeds and there's not a super easy way to do it, so here's what I did....1)strain the seeds 2) stir the seeds with a paper towel in your hand 3)take a paper towel or real towel, pour the seeds in the towel and dab. Then put the seeds on a foil or wax paper sheet and let them set over night to dry out. I then transferred them to a pizza pan and let them lay flat for about 5 days to dry out! VOILA....you have seeds ready to plant IN THE SPRING! So throw them in a shoe box or paper bag and put them in the basement or closetf until spring!!!!


TO MAKE THE FILLING!!!
Now, I used 2 large pumkins and 1 small pumpkin!

Supposedly, the smaller the pumpkin, the sweeter. That's yet to be determined in my kitchen, so a good idea is when making your pie, to taste test your filling as you add sugar to decide on the right amount!!


Now, you have scooped out the slime and seeds and all I have is the shell of the pumpkin. YOU WANT TO COOK IT! You can microwave it, boil it, bake it, I don't care...just cook it! Now, I am ANTI-MICROWAVE on anything but frozen corn! There's something very wrong about microwaves in my opinion, so I bake my pumpkins.

Take your slices, turn them upside down on a pan, bake for about 1 to 1 1/2 hours on 350 DEGREES, until you can stick a fork in them when they are tender.


When they are tender, take then out, turn them back around, and scoop out everything but the skin with your scooper or spoon or whatever! Toss the skins and save the rest in a bowl.


Puree the insides until smooth (I use a hand puree for liquids, because it's awesome!). When you finish, you filling is ready! Find a HOMEMADE Pie recipe that you like, that will have you use real pumpkins for filling because you will add to your filling! I will post in a couple of weeks my recipe!

NOW....for the time being, I frozen my pureed pumpkin! For a good size pie, it make take up to 3 cups of pureed pumpkin. So, since this is my first year, I froze in bags 4 cup portions just in case. So if you do this and you have an overload, just make a tiny pie to go along with it!!!

ENJOY!

Saturday, September 18, 2010

Sweeter Than Me Apple Pie

So here it is, by popular demand. This pie is always a HIT!!!! People love it. It also just so happens to work well with the fact that I have 4 apples trees and I can as many apples as I can late in the Fall….well, that is until I cannot look at another apple without wanting to throw it through the window. I’ll tell’ya….there’s got to be an easier way to core apples and peel them than with this crank corer/peeler! But for now I guess I’ll be happy with the fact that I don’t have to do it all with a knife and a push down corer….YUCK…I’ve done that before!!

So here’s a bit of information you may want in attempting to make this pie……you can use store bought canned filling BUT I WOULD SERIOUSLY ADVISE AGAINST IT!!!...1) Because the ‘filling’ with the apples is this odd gel substance that I wouldn’t feed to my dogs, which brings me to #2) It’s just disgusting plan and simple. I actually haven’t figured out which way I like my pie best, that’s mainly because I never fill it the same way twice it seems, and it’s normally so good the next time I make it that I never remember which way I like it best! Nonetheless, as long as you stick to either fresh apples or canned apples or canned apple sauce (using my recipes)….then you’ll be just fine!


So here’s just a few ways you can fill with pie….

1)All fresh apples
2)All Canned Apples (homemade, of course)
3)Fresh with Applesauce (homemade, of course)
4) ½ Fresh, ½ Canned
5)1/2 Fresh, ½ Applesauce
6)1/2 Canned, ½ Applesauce
Or 7)….just go crazy and throw all 3 together in the pie.

WHATEVER WAY YOU CHOOSE TO DO IT….JUST MAKE SURE IT’S A HEAPIN’OUT OF THE TOP OF THE PIE CRUST (as in don’t just stop adding apples when you get to the top of the crust…you want your pie to have some height to it)

OKAY……so here’s the recipe
CRUST
1 ½ c. all purpose flour
½ c. vegetable oil
½ tsp. white sugar
1 tsp. salt
Just a couple of shakes of cinnamon


TO MAKE THE CRUST….

Throw all those ingredients in a bowl and mix it well! I use my KITCHEN AID Stand-Alone (1)because I love it, 2)my honey bunny bought it for me our 1st Christmas together, and 3) ITS RED!!!!)

Once you’ve mixed your ingredients well, toss them into a GREASED Pie pan. Now, the easiest way to do this is just use your fingers, knuckles and palms to flatten the crust onto the bottoms and sides of the pan…..and now, to fill….

(now again, decide how you want to use your filling from the previously mentioned list….in this case, I will show you will ½ applesauce and ½ homemade canned filling)
Put your filling and sauce (in this case) on the crust and even out. AGAIN, no matter what method you use, you want some height on the filling. If you choose to use fresh apples alone, keep in mind that the apples will cook down in the pie, so much sure you give fresh apples some EXTRA HEIGHT!!!!! Now, IF YOU ALSO USE FRESH APPLES, you want to remember to put about ¾ cup of sugar and about 2 tbsp cup of cinnamon over the top of the apples with about 3 tsp. cup of flour. If you use canned or applesauce, you don’t have to add quite as much sugar in the filling however, you must make sure that your canned and sauce is kinda sweet already.

Now, you can reduce the amount of sugar of course for canned or sauce, but I must say, this is SWEETER Than Me Apple Pie…..now that’s gonna have to include a lot of sugar if it’s gonna be any sweeter than me!!! Still, you do have to use about that much sugar for the filling with fresh apples because it cooks with the water in the apples to make a sauce/filling within the pie.

ALSO, thank goodness one time I didn’t use flour in the actually filling because my cousin was eating it, and she is gluten free…..so at least she was able to enjoy the filling at least. Now, I don’t know anything about gluten free flour but I guess you could use that in place throughout the recipe.


NOW FOR THE BEST PART……THE TOPPING…..

Okay, not knocking those stripety topped apple pies…..but this is supposed to be mouth wateringly SWEET….and if I wanted to cover the whole thing in crust, I’d just fry me up a pie…..which I’m not doing just yet…..
The topping for this pie is sweet ,crunchy and chunky……use


¼ c. Butter or margarine
½ c. Flour
½ c. Sugar
-2 tsp. Cinnamon.


Soften your butter a bit and throw all ingredients together back in your bowl to mix. If you have a cutter you can use it, but for me, since I have no cutter, I simply put my whisk looking attachment on my mixer and let’her rip. You want to butter to combine with the sugar and flour (and cinnamon) to make mouth watering chunks.

Now, there’s two ways I form the topping for the pie…..sometimes I let it mix into little bitty balls about the size of a pea or a bit bigger….on medium high speed. Or double to topping recipe and let them mix into both little and big pieces. This is so you can cover it in the little pieces while randomly placing the bigger chunks on the top. This is to create extra bites of HEAVEN throughout eating a piece of this pie.

My favorite of course is the latter (remember the pie’s name) but whatever you choose be generous with this topping allover the pie. (in my experience it’s always better to double this topping recipe no matter what.)

Once you have put the topping on, let that sucker cook nice and slow at 350* for an 45-1 ½ hours just depending on your oven power….basically, you want the pie to get nice and brown on the top!!! (remember to put a pan under the pie pan in the oven to catch any drippings!)……

Now, if you are making this pie for company, make sure that you make it at least 3 hours prior because it’s gonna be hot for awhile after you take it out.

A BIT OF EXTRA ADVICE….

When I make a pie, I normally make about 2-3 of them (I’ve always gotta send one to Mom and Dad’s house since my Mother no longer cooks munch …and she definitely doesn’t cook random sweets just because she feels like it)….also, if the Hubby were to ever find out I was cooking a pie for someone without making him one to enjoy for a few evenings, I’d definitely be having to find myself a new kitchen to cook in!!!! So, I like to make these pies ahead of time if I know I’m gonna be busy with the little on the day it needs to be made.

IF YOU PRE-MAKE THESE PIES, EVEN AS EARLY AS THE DAY BEFORE, MAKE SURE YOU PUT THESE PIES IN THE FREEZER…..when you are ready just pop them in the oven frozen and all, just let’er cook a bit longer! (you don’t have to thaw it) Don’t put it in the frig to store over night to cook the next day…..for some reason it will dry it out and the topping won’t turn out right. BUT OF COURSE, IF YOU CAN, YOU ALWAYS WANNA COOK THIS SUCKER FRESH!!!!!!

ENJOY!!!!!

Sunday, September 12, 2010

This is what happens when there's a one year old in the house!!

Colby's spitfire Aunt Noma is so funny!

She just sent me a FB message telling me about trying to make apple dumplings, but the cards just weren't in her favor on this day....STORY OF MY LIFE, in the kitchen anyway!!

Last week I was making homemade Italian Beef Buns .... never again! The first batch I forgot that I had a 'dough' setting on my breadmaker and didn't get to it in time to take the dough out before it started cooking!....found it 1/2 cooked, and instead of just letting that cook for 45 minutes and make sandwich bread out of it, I actually took it out and threw it away so I could hurry up and start my second batch so Colby could eat by about 6:00.

The second batch I doubled the recipe.... but realized, when seeing the dough was 'watery' at the end of the kneading cycle, that I had forgot 1/2 way through putting my ingredients in the bread machine that I had doubled it....So the first 1/2 of the ingredients were doubled, and the second 1/2 put in were regular measurements for a single batch...ugh.....

The THIRD and final batch I doubled all the ingredients....except for the yeast! So, the buns were a bit flat, but still pretty good, when we finally were able to eat our sami's....at 9:00 at night!

This is what happens when you try to cook with a one year old in the house!!

Tuesday, September 7, 2010

If you weren't giving it....then why did you ask so many darn questions about it! (The anniversary gift)

WOW……Two years!!!! We’ve actually been together for a total of 3 years but married for 2!!! I never thought it was possible but we are the couple that everyone hates! 1)We don’t fight and 2) We literally live every day for each other and for our daughter! We have our priorities straight when it comes to how we want to live our lives and raise our children!! We are completely in sync; and I must say that if the biggest thing we fight about is the crumbs he leaves on the table after he eats, or the same spot he throws his undies when getting in the shower, then we are doing pretty good! Yeah, yeah, I know what some couples are thinking, “Just wait till you get some more years under your belt, you’ll hate each other.”…..well, I guess only time will tell, but for the time being, we are sure having fun spending every minute together!!!!

SO HERE’S THE BACKGROUND….

So I’m sure that this anniversary will be as great as every single gift giving occasion……but of course, I refer to those occasions pre-Biscuit! Now that we have the Biscuit and have made staying home with her #1 priority, the gifts tend to be random…..But what is consistent is that in myself staying home with her with no career right now, the gifts Colb receives are limited to Birthday and Christmas. Not much has changed in the gift giving department for me however; in fact, he always seems to outdo himself as time passes. FOR MOTHER’S DAY THIS YEAR…..LASIK….WOW!!!! Now I must say that I begged for it, with my new found eye allergies since moving to Hardin County. In all seriousness he is no longer obligated to buy me a gift for any occasion for the next 10 years….said so by me. Lasik is HUGE….and extremely costly, especially for people like me that could probably pass for legally blind!

Well, of course my gift for my birthday a couple of months later was a Brazilian Blowout. He did a fantastic job of getting it considering I had only mentioned it to him maybe once or twice. The result pic is in the WELCOME FALL posting.

OKAY, BACK TO MY MAIN POINT….
So here comes our anniversary, and to be quite honest, we have been especially been busy the past few weeks so I definitely didn’t expect anything. Not to mention the fact that the man had just bought me Lasik 3 months ago and I didn’t’ have the money to get him anything in return.

So we go to dinner and are having a nice typical conversation. All of a sudden he asks ‘So how much money do you have in your Camera fund’ (many of you know that I started a camera fund about a month ago to buy my very first Canon Rebel)….Well, since he asked I informed him that I had $280, but unfortunately had to use $180 of it, which by the way was my birthday money, to put gas in my car, go to Wal-Mart like 8 times as well as any spending money at two fairs and a couple of fun girl swim days. Now, not complaining, but I really don’t think birthday money should be used on gas or Wal-Mart, but that was the only money I had. I figured that when he heard this he would replace some it. But in all honesty, the truth is that he gives me money anytime I need it. So really, what’s birthday money anyway?

But this wasn’t just birthday money…..THIS WAS MY CAMERA FUND!!!!! So now I’m back down to $100 for my fund, which means I was just that much farther away from meeting my goal for purchasing the camera by Thanksgiving.
Okay, no back to my story again……

So he asked me about the camera fund, and then proceeded to ask even more questions, like ‘How much is the camera you want’, etc. Let me tell you, we talked about the camera for about 15 minutes, and even though I was doing most of the talking, he sure was asking a lot of camera questions. Why all of these questions all of a sudden about a camera that he never cared about before. In fact, every time I mentioned the words CANON REBEL, he would roll his eyes and remind me of the camera he got me for a wedding gift???? I’ll tell you why…..of course!!!!.....he was going to buy the camera for us tonight as an anniversary gift!!! That’s why he kept talking about it!!!! In my head I kept trying to tell myself not to smile on the outside…..but secretly on the inside I was practicing my surprise reaction for when he said we were buying it!!!! I already thought up the shots I would be taking the next day of Noa on top of the bales of hay in the field! But for now, I was just going to enjoy my yummy shrimp!!!

So we left the restaurant, and of course he was making excuses to get me to Wal-Mart….he kept asking me ‘Are you sure you don’t need anything from Wal-Mart?’…..and then he found an excuse to run to Sam’s to look for something…..I knew what he was doing. So Sam’s was closed, but not Best Buy….so we pulled up and he said ‘Let’s go inside and you can tell me all about this camera’….I KNEW IT!!! Of course Best Buy would be much more expensive and he would have to take me to Wal-Mart in the end to buy it, but I just knew the camera was mine!

So we went in and I showed him the camera, which by the way was $50 more at Best Buy than Wal-Mart….right across the street….but I showed him, along with the huge lens that I would eventually ask for the next Mother’s Day, Birthday or Christmas. So we walked around the store, and just as we were leaving to go to Wal-Mart to purchase the camera he turned to me and said …….‘Honey, you know that if I had over $500 I’d buy you that camera in a second.’


NOOOOOOOOOOOOOOOOOOOOOOOOOOOOOO!!!!! But of course I smiled and said ‘I know baby’!!!
YYYEEEEEEEEESSSSSSHHHHHHH!!!!

Sunday, September 5, 2010

Applesauce and Apple Butter.....

So, I've included these two together because to get one, you must go through the other. In fact, I could even post the filling, sauce and butter in one. As in my earlier posts, you will do the same as when you make apple pie filling. It is up to you if you want to put sugar in the apples as they are cooking in the stockpot. I do just because I may make all three items with the stockpot of apples. Here's how I would suggest doing the sauce and butter....

Okay, cook your apples in the stockpot the same way you would in the earlier post to make pie filling. However, instead of cooking them in the stockpot for 1/2 hour, I normally will let them cook for at the lest 1 hour. This will help the apples cook down and will make the sauce easier to make. Now once you have cooked the apples and they want to fall apart easily, carefully pour them in a strainer to drain. Now, for the next part you can use a food mill to crank the apples through to make sauce, however, I would suggest an easier route.....USE A HAND HELD POTATO MASHER. Mash those suckers on up!! It's the quickest and easiest way to do it. Tastes the sace and see if it needs 1/2 cup or so of sugar.

You have the option of canning the sauce in the two ways described in the apple filling post. Either boil the jars closed with the tops and lids to seal, or just turn them upside down to cool on the towel....upside down only works if the applesauce is hot.

FOR THE APPLE BUTTER....

Take the apples sauce, cool it, then fill your crockpot to about an inch from the top. For example, I have about a 5.5 qt crockpot, so I fill it....then add 2 CUPS OF SUGAR and about 2-3 tbs of cinnamon. So I'm using my crockpot and measurements as examples, so if you are using a larger crockpot or smaller, you will have to do the conversions. Let that cook on HIGH OR LOW for about 10 hours...I would suggest on HIGH FOR 10 HOURS.....this will cook down. Then stir in about 2 more quarts of Applesauce (pretty close to the top of your crockpot) then 2 more CUPS OF SUGAR. Let cook on HIGH OR LOW for another 4-6 hours.

Scrape the bottom of the crockpot every hour or two so that you don't have burn spots. Can in the same way as the applesauce or pie filling.

Friday, September 3, 2010

APPLE PIE FILLING......

So, in finding this great purpose, came a love for the great things that the earth can produce naturally! My green-thumbed MIL planted 5 apple trees years ago at the farm...unfortunately 1 didn't survive; still the first year that I was on the farm I noticed I had 8000 apples, and 0 clue what to do with them! My wonderful Mother reminded me of the adventures she and her Mother had canning with the family when she was younger! I guess this instance is how it all began for me! Canning apples was clearly the only thing to do with them! Of course the next year I got an itch to make 30 jars of applesauce for my daughter (who really doesn't eat it too often), then the year after that I decided to use some of the fresh apples, as well as the old jars of applesauce to make the perfect replica of Marion, Kentucky's Amish Communities Apple Butter! The applesauce and apple butter are in a different post.

CANNED APPLES
Core and Peel your apples. (In this case I have a corer/peeler that does the trick and saves some time)
Now, if you are using a corer/peeler hand crank I would suggest leaving the apples as whole as you possibly can. If you are hand coring and peeling quarter your apples. In this case, I love the time the peeler saves me, however, it cuts my apples into corkscrew shapes!

Once you have cut, cored and peeled your apples, put them in a large stockpot and fill with water. The apples will make their own water too so I wouldn't fill the water to over the apples, maybe just under the top apples.

Put on the stove to boil, with about 2-3 tbs of cinnamon (optional) as well as 1/2 to a 1 cup of sugar. Bring to boil, then reduce and let simmer at least a half an hour.

Now, you have two choices, you can either funnel your apples and some juice into the sterilized jars (don't forget to let your tops and lids boil in water for about 10 minutes prior), seal the jars and put in a large stock pot/canning pot and let the jars boil in water for about 1/2 to seal the jars. (I do this with my salsa).

HOWEVER, with apples and tomatoes, I go the quicker route. If your apples and tomatoes are coming directly from the pot, they will be hot enough to seal the jars. So, fill your jars, then put the tops and lids on very tight, turn upside down on a towel to cool....this will seal the jars. If they cool and you see that one or two isn't seal, drop the jar in boiling water for 1/2 hour....that should do the trick!

WELCOME FALL...

Well, I’ve never been so happy to say that today it’s under 70 degrees this morning. The storm clouds are comin’ in and Momma just opened the windows and the breeze is flowing through the screen door! It’s definitely been a very hot summer; and two years ago I would have been so excited to run around in my bathing suit just to make sure I didn’t get any tank top tan lines. The summers around here we almost live in our swimsuits, but this summer was almost as hard as the last. Last summer, Noa had just been born, and of course I was never afraid to take her out in the heat. What I was afraid of was the 18 bags that had to follow us everywhere we go. And for this summer, Noa decided she would wait until the last month of the summer to walk. What that meant for the Potts house was a repeat of last year. Who would have ever thought that when she decided to walk, a whole new door would open for us. Now that she’s walking, we no longer have to worry about her not moving off the blanket on the sand bar, or refusal to roam 6 inches from Mom when she’s trying to get something done. Who also would have known that in deciding to walk, that our 18 bags would finally be combined into ONE BAG!!! WHOOHOOO!!!! Now the Biscuit is running around like crazy, which also means plenty of bumps and bruises along the way. She has been walking for about 3 weeks now and we’ve definitely had our share. This includes one fall into the stone fireplace, one running head dive into the coffee table, one standing slide off Mom’s leg onto a picture frame, all wrapped up into one call to the emergency room and two cuts on her face! Everyone tells me that plenty more falls are in store but I really don’t think Momma can emotional handle anymore little bruises! Noa has had so much fun since she started walking. My house has become a war zone for her hands-on learning; which definitely doesn’t coincide with Momma trying to keep the house clean. This month has been so great! With her walking now makes going to place, like the DQ St. Fair so much fun! She loved going to the fair this year and enjoyed all the animals! She didn’t like the goats at the petting zoo, but would rather have watched all the show cattle! She loved them!!! So yesterday we went to the Zeigler Homecoming, and of course Noa had a great time! She loved the parade, even the loud noises!! She was of course adorable all day and has so much fun walking around! She also got to see her Great Aunt Toni and Great Uncle Richard! We always love when they come into town from Michigan!! So also got the see Baby Sylvie!!!....daughter of my dearest hs friend Alli and her husband! Of course Noa was more interested in their adorable dog than the baby! AND KUDOS TO ALLI, she has been successful at BFing Sylvie and everything is going great! WE MOMMIES ALWAYS LOVE IT WHEN BFING IS SUCCESSFUL!!! Many of you know that my birthday is in August….and this year the family and hubby definitely outdid themselves! Mom, Dad and Amber got me a large picture that was taken when Noa was 2 months old laying in her Daddy’s hands. Colby got me a Brazilian Blowout (after pic below). It’s so wonderful not having to flatiron my hair every day and I can even let me hair air dry if I want to. The only downside of course is that it will only last about 10 weeks. So moving on, enough about the hair! But speaking of hair, when I get a wild one and always want to cook something new and exciting, I always look to new ideas on the internet from my fellow Momma’s!!! Of course one of my absolute favorite women in THE PIONEER WOMAN….which is my new Paula Deen! The woman is amazing! Not only does she cook but she also a self-taught Photoshopper! She even posts her PS tutorials on her site, which by the way is the #1 way I have learned new PSing tricks!!! I’m sure that if you look through my pics you will actually a steady increase in PSing quality! Now I’ve even been inspired to purchase an actual pro grade camera….but to start, one on the lower end, and then work my way up to a higher quality once I get back to work! WOW….I started on one path and I completely sidestepped to photography! Back to my original idea….. So I always get some good ideas from the internet but when I actually get in the kitchen I find myself completely remaking the recipe to fit ‘our likes’!! In fact, the only recipe that I ever been able to follow throughout to a ‘T’ of the original is that of my Mom’s and her Mom’s (my always cookin’ Grandma!). So I’ve decided that I should include recipes on my site, as well as some pics of my hairbows that I make for the Biscuit and my friends daughters! So more of that to follow soon!

Wednesday, July 21, 2010

....NOT A BABY ANYMORE.....


WOW!!!!...

We cannot believe July is almost over and we have been so busy the first half of the summer! While we have had so much fun in the first half of the summer, we are looking forward to a 'bit of a slowdown' in the near future! Let's see.....where did we finish off. Oh, yes, of course, right before vacation! Well, it's not going to take a blog post for us to always remember this summer, for not only was it the summer of our Biscuit's first birthday, but it was also the summer of two very big events, one was the biggest oil spill that our great country has ever seen, which would effect us even though we live hours away in Illinois. The other major event was the great scare that our family recieved in the spring and early summer.....that I will come to in a bit!

So for the month of May and also the beginning of July, it seemed that we lived on the internet, watching and waiting for oil to reach Panama City Beach, where we were scheduled to vacation in the middle of June. About a week or two prior, it was clear that the oil was close, so close that it was in Pensicola. So, in the end, we took a gamble and decided not to cancel our vacation and hope that we missed the oil! Lucky for us, we definitely missed it! It was so wonderful on the Gulf, no rain in sight for the week we were there and Nan and Pop (my Mom and Dad) also went with us. That meant that between the 4 of us, we were each able to relax a bit while still running steady after Little Noa. Our condo was lovely, the beach was wonderful, the water was clear as day and warm.....it was the perfect vacation, which was what we needed after the last couple of months, especially for Nan!


Noa had so much fun on the beach, in the water and also swimming in the pool. Each day on the beach seemed to start with a long nap under the umbrella's for the Biscuit, then followed by play that usually consisted of a refusal to get her feet in the sand....of course in true Diva fashion. Dinner was of course wonderful each night. Our second to last night there was a nice surprise and a lesson learned that Japanese food and alot of ice cream can end up with a child in the emergency room. Of course she was just fine once we got the hospital....I guess she just had some uncomfortable indigestion. So chalk that one up to a lesson learned.

HAPPY BIRTHDAY BISCUIT!!!


That weekend after we returned home, we had a Father's Day celebration for the Dad's, that was of course overshadowed by the BISCUIT'S FIRST BIRTHDAY! We had a small little party with Nan, Pop, MeeMaw, Jim, Aunt Amber, Aunt Crystal, and Cousin Ella. And thank goodness we decided to only have a small party this year, because of course Noa got everything she needed and even more! It was so wonderful watching her 'open' her presents and to see her have so much fun with all her new toys, which consisted of a house with those fun little balls, a giraffe pool, a remote controlled dog, an outdoor climber/slide play set, a picnic table and a wagon! It was such an emotional (a good emotional) experience to watch our baby 'dig' into her cake, which again, in Diva fashion, meant that it she didn't make the mess that we thought she would. It was so cute to see her picking the small pieces of cake and slowly eating it off her fingers, as to ensure that she didn't drop any from her hands onto her....which wouldn't have matter to begin with. The cake was wonderful, Nana had the same woman that made our wedding cake bake it...Noa's was chocolate and the large cake was strawberry.....it was wonderful! And a good time was had by all!!


We had so much fun on vacation and with Noa's first birthday, but the scare, that I referred to in the begining of the blog, still hung over our shoulders throughout all our fun. When it wasn't in the front of our thoughts, it was definitely in back at all times! At the beginning of April, a large mass was found on Nan's (Kendra, my Mom) kidney. Long story short, the general consensus was that they felt 95%-98% sure that it was kidney cancer. Unfortunately, they didn't know whether it was a common type of cancer (that was slow growing and wouldn't require treatment) or if it was a more rare, and aggressive type that would in fact require some treatments. It would be a very long wait as the surgeon, we all agreed that we really liked, couldn't get her in for surgery till the end of June. So on June 25 we all assembled at the Vandebilt Medical Center waiting room to find out the final verdict. The surgery was supposed to take 4 hours, but after 2 they were closing her up....we talked with the doctor shortly after, and also had to wait an entire week for pathology. However, by the grace of God, we found some people really do fall into the 2-5% category! What the surgeon found was not cancer afterall, but was in fact what is called AML....which basically means that Mom had a benign tumor and she's going to be just fine! The only thing wrong with her is that she's meaner than a snake, and of course we wouldn't have it any other way. God works in mysterious ways, that for sure, but I've learned to never take anything, or anyone for granted! We are so blessed that Nan's gonna be jus'fine!

With all the great news we knew that it was definitely time to celebrate! The next couple of weekends were free for us and so we spent alot of time on the river....which is great for Noa because that meant that she got to see all her little buddies! We also had a wonderful Fourth of July on the river with great friends, followed by a cookout and fireworks at Sand Ridge! It was Noa's first camping experience in our new camper, and it was a great time!


Just a few updates...Noa just loves all of her books and spends most of the day looking through them and having us read to her. I wonder if she will one day write her own?!?! She's almost walking as well!


After the start of July, Noa (and Momma) went to Krissy's house to see Drew and the rest of the buddies for a playdate! They had so much fun and was a great chance for the Momma's to gab....especially with the time getting closer to Krissy (and hubby Jon) welcoming their second son!


As we haven't been busy enough, we've added a very special day to our weekly schedule, which is just what Momma needs! Our good friend Janice hosts a girls day (+kids) every Tuesday! It's so nice for the Moms to get together and great for the kiddos too! Another great surprise of the summer is that Daddy is going back to dayshift (from evenings)....we are so excited to have Daddy around in the evening!...And Momma is excited for some help with bathtime for the Biscuit!! More to come soon!!!.....